|
|
Installation of a chip such as Jody Tipton's requires removal of the PCM, cleaning of the contacts and installation of the
chip. If not done properly, the chip will not work and you may not even get the truck to start. It is also possible to damage the
PCM to the point that it would need to be replaced.
Got a question? Contact me on my DieselOrings.com webshop CONTACT PAGE
|
|
Put the keys on the work bench!Remove the keys from the ignitions and set them on the bench. With the keys just
inserted into the switch, the PCM is in a "wake up" state and can be severely damaged simply by unplugging the firewall connection.
It has been stated that the batteries do not need to disconnected but I would suggest disconnection both positive cables while
installing your chip.
|
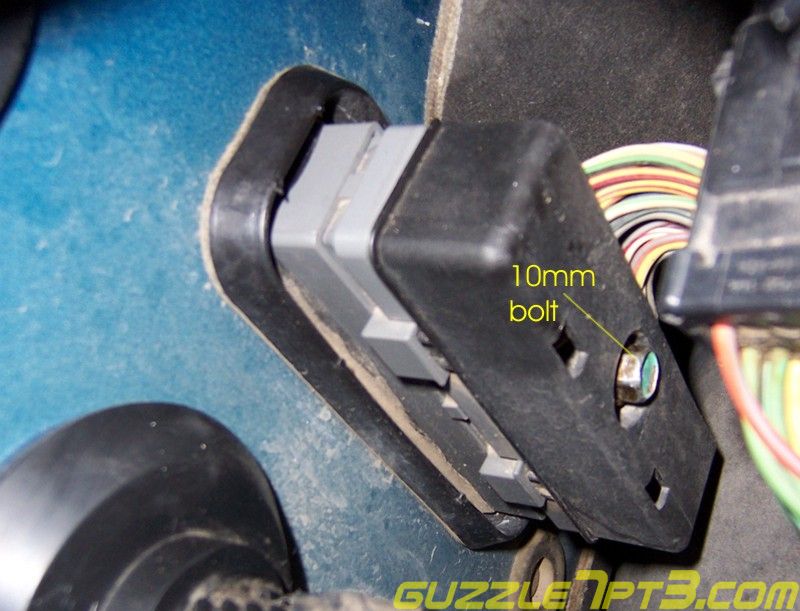
Disconnect the PCM PlugLocate the PCM plug on the firewall below the master brake cylinder. There is a
10mm bolt that needs to be loosened. This bolt will remain in the plug but must be unscrewed from the PCM.
|
|
Once the plug is removed you can move into the cab. The PCM is located in a plastic case held in place with a metal bracket.
The screws holding the bracket in place must be removed and by pushing the end of the PCM closest to the driver's seat towards the
passenger's side, the PCM can then be slid away form the firewall. Once the PCM is free, move it to the workbench.
|
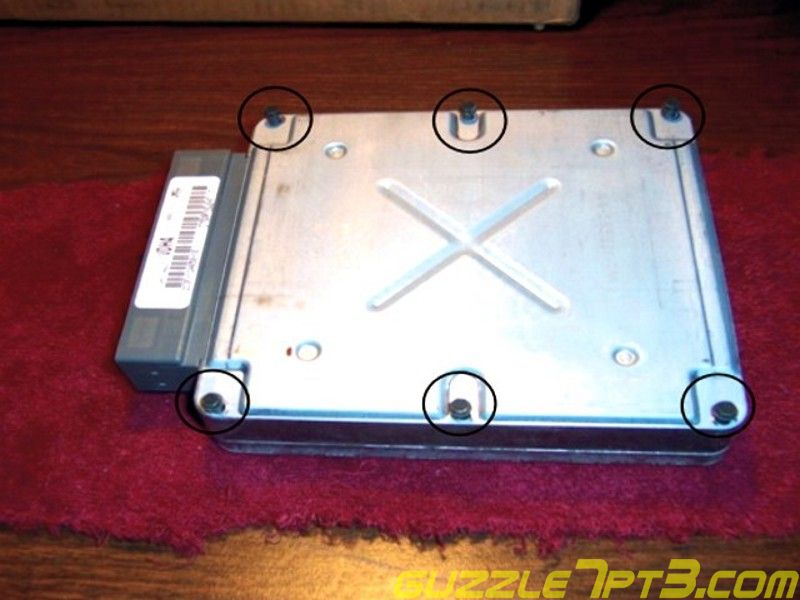
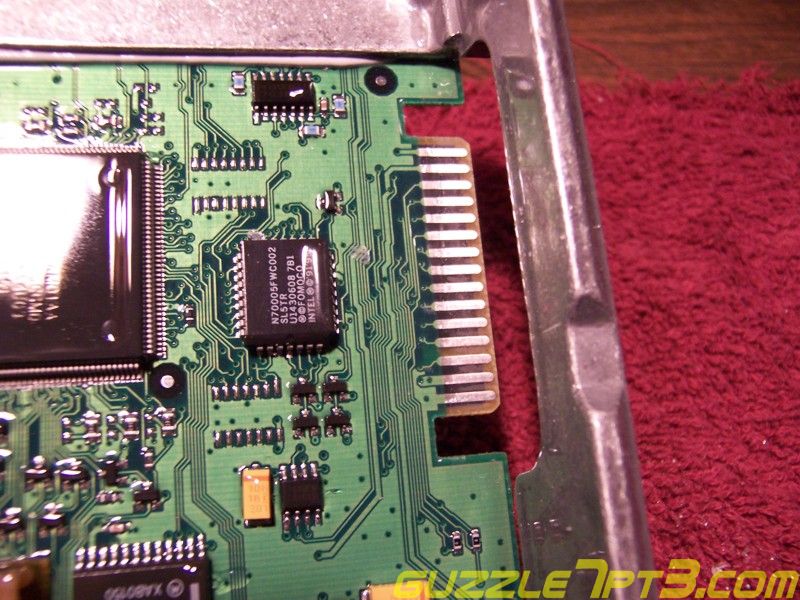
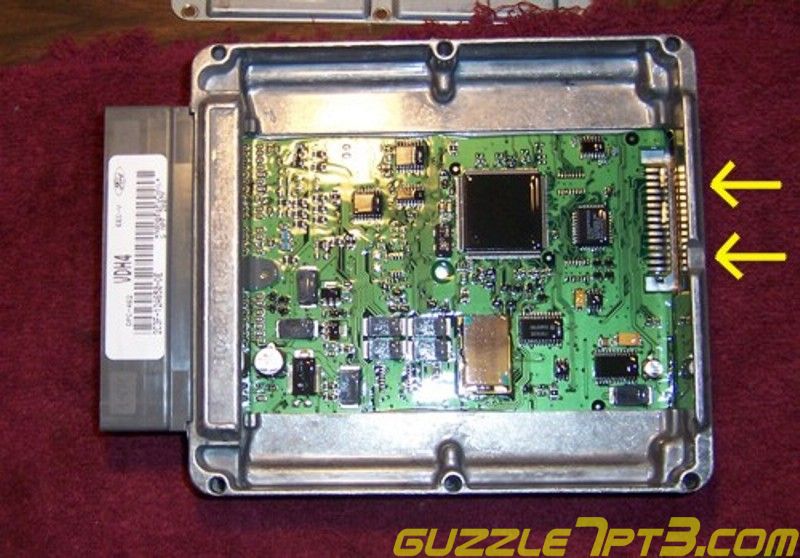
Opening the PCMAn original factory PCM has a very thick coating of silicone protection over the contact area where
the chip has to be installed. This silicone must be removed and the contacts cleaned or the PCM will not work when the chip is
inserted. I have found that it is much easier to clean the contacts with the PCM opened up rather than trying to reach the contacts
through the small opening on the end of the PCM. Place the PCM on the bench with the six cover bolts facing up. You will remove
these 6 bolts and remove the cover. Turn the PCM over and you can remove the bottom casting from the case.
|
|
Cleaning the contactsUse care in removing the heavy silicone coating from the contact pins. By carefully using a small
knife, you can scrape a small amount of silicone off at a time. Do not scrape so much off that you are actually touching the metal contacts
as that will be reserved for the Scotchbrite pad. Continue to scrape both sides of the contacts until there is a very thin skin of silicone
on the contact area. Dip the Scotchbrite pad in a small amount of lacquer thinner and scrub the contacts just enough to brighten the
solder on the contact pins. DO NOT SCRUB THE CONTACTS HARD ENOUGH TO REMOVE THE SOLDER AND EXPOSE THE BRASS PINS.
|
|
Install the ChipPlace the bottom case and cover place back on the PCM and re-install the six screws. Insert
the Chip into the opening on the end of the PCM and press firmly to completely seat the chip on the contacts.
|
|
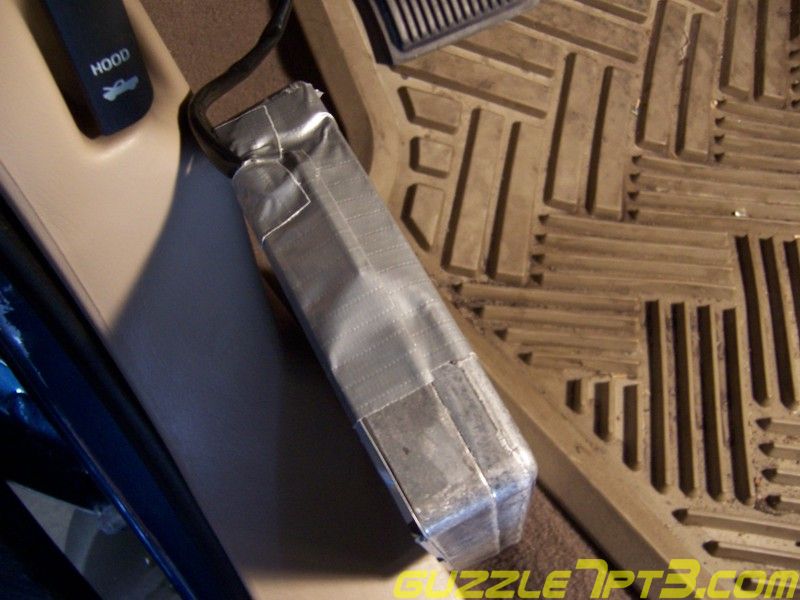
Reinstall the PCMTo keep the chip from working its way out of the PCM from road vibration, use plenty of duct tape
to secure the chip tightly into the PCM opening. Slip the PCM into the plastic cover and I have found that by placing a small amount
of dielectric grease on the outside of the PCM connector that slips through the firewall. This will help to keep the PCM from pushing
the weather tight grommet out of the firewall during installation.
|
|
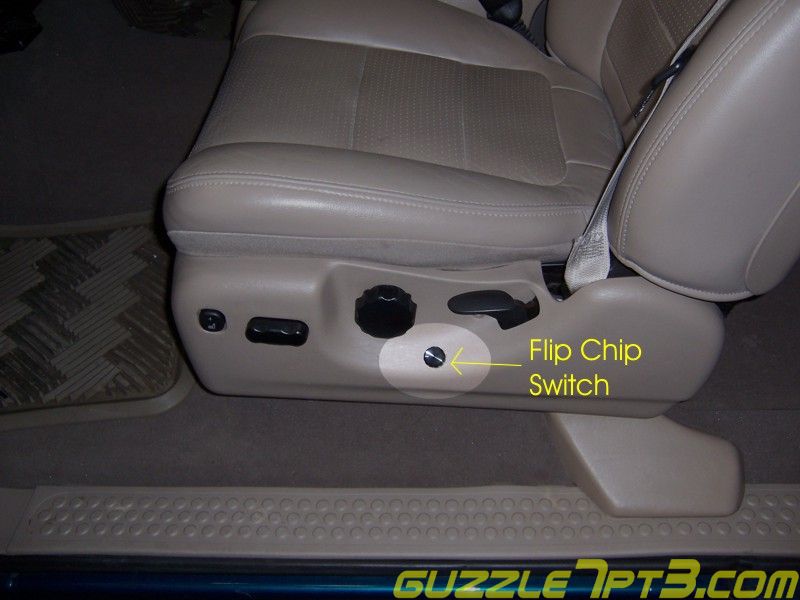
Mount the switchI have one of the older 6-position flip chips and decided that I wanted to mount the switch on the
side of the driver's seat. To do that, it was necessary to increase the length of the cable but most will install the switch somewhere
on the dash. The new F5 digital display switch should be mounted on the dash or pod mounted.
|
|
Once you check all connections and fasteners for tightnesss, reconnect the batteries and start the truck.
The guages will all go to full scale and return to normal indicating that the PCM has performed a reset from having the batteries
disconnected. Start the truck and prepare youself for some fun!
|
Back to guzzle's Powerstroke Modification Index |