|
|
|
| [Click on a thumbnail to see a larger image - - javascript
must be enabled and popups allowed from this site]
|
|
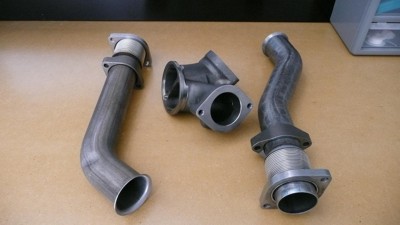
Figure 1 - International up-pipes fresh out of the box. Not pictured are the stainless
steel gaskets and the assembly bolts. Note the dent in the driver's side pipe is
normal.
|
EDITORS NOTE:
Curtis has done a fantastic job with this writeup but when installing the new International
bellowed up pipes, I have found that the passenger's side up pipe to Y-pipe collector is very difficult
to reach the bolt closest to the firewall once everything is in place. I attach the passenger's
up pipe to the Y-pipe and torque it down and loosely attach the driver's side since it is easily
accessable from under the truck with a couple of 12" socket extensions. This is the opposite of what
Curtis has suggested in this writeup.
-guzzle
|
Introduction:
I made this guide in response to requests by several people looking for step-by-step instructions to
replace the up-pipe assembly on the '99-'03 Ford 7.3L Powerstrokes. The steps outlined below are what I
used on my own truck and worked well for me. Your steps may vary, and I tried to include some of those
options. I also assumed that you know how to remove the turbo. If not, there are several guides available
that will show you how to do it. Please note that I take no responsibility for your engine or truck by
using this guide. Also I take no responsibility for your fits of anger, frustration, and/or rage
encountered during this procedure. This guide assumes that your transmission has not been removed for this
swap. If your transmission is currently out of your truck for the up-pipe swap, then your job just became
10 times easier.
|
Purpose:
The stock Ford up-pipes are designed using a crush donut gasket to seal the up-pipes into the
y-collector. Over time, the expansion and contraction cause the donuts to leak, hurting engine performance
and mileage. The obvious symptoms of an up-pipe leak are black soot present around the up-pipe/y-collector,
and even soot deposits on the firewall and nearby engine components. Using aftermarket gauges, a PSD owner
can also see a drop in boost and higher EGT's. The International up-pipes are bellowed and do not use crush
donut gaskets. The bellows allow for expansion and contraction and rarely leak over time. Although not a
performance enhancement (unless you get ceramic coating), the International up-pipes are a worthwhile
investment when exhaust leaks are found, and serve as a proper fix for Ford's "flawed" design.
|
What you'll need:
Standard and metric wrenchesStandard and metric socket setsExtensionsA few other basic hand toolsInternational up-pipes service kit (part #: 1837872C93) (Available from
DieselOrings.com)Turbo pedestal o-rings, 2 of each (part #: F4TZ-6N653-A and F4TZ-6N653-B) or from
DieselOrings.comPenetrating lubricantAnti-seize compoundSafety glassesOptional: air tools, wobble extensions, swivel sockets, beer
|
Before you begin:
This job is not difficult in reference to technical skills required. It is a very time consuming, and
at times, frustrating job. You should plan on 5 to 7 hours to complete the job, depending on your
temperament and luck. Any shade-tree mechanic can do this, but it does require patience. Here are some tips
to help with the job:
Penetrating lubricant is your most important tool!!! Spray as many of the up-pipe bolts as you can
reach, as well as the down-pipe and up-pipe collector v-clamps. The lubricant will work best if you spray
the night before you plan on working on your truck, then again right before you dive in. This is your best
bet for making removal of rusty components easier, as well as reducing your chances of stripping a hard to
reach bolt. You'll see on several pictures where I was very liberal with the penetrating lube, even on
exhaust bolts I didn't need to remove.
You will be laying on top of the engine quite a bit. Make yourself comfortable with a topside creeper
or thick blankets.
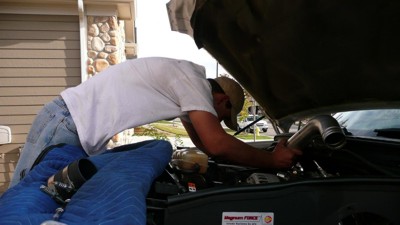
This is a dirty job (even on a relatively clean engine). Wear safety glasses when underneath the engine
as all the rust, corrosion, and dirt breaks free from the exhaust pieces. Clean ALL components and
connections thoroughly prior to re-assembly. Nothing like going through all this trouble, only to end up
with an oil leak or another exhaust leak.
|
Let's get started...
1) Disconnect the batteries and remove the intake pipe, intercooler tubes, intake spider, turbo, and
turbo pedestal (Figure 2).
a. If you have a modified fuel system or oil hoses, and those lines prevent you from
removing the turbo, disconnect them. If fuel/oil is oozing out, reconnect the lines after the turbo is
out.
b. It is optional for you to remove the down-pipe. For stock trucks, this might not be the
easiest solution. On my truck, I left the down-pipe in place to demonstrate the job can be done without
removing it.
c. Another option is to remove the passenger's plastic inner wheel well for better access
of the lower passenger's side up-pipe bolts. My truck is lifted and I found that wasn't necessary.
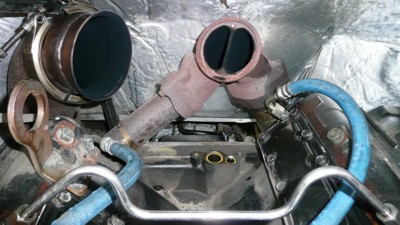
Figure 2 - Intake tube, turbo, pedestal, and intercooler pipes all removed. For this
guide I left the down-pipe installed, but that is an optional piece to remove to access the up-pipe bolts.
I reinstalled the HPX line due to oil seepage.
2) Using a 10mm socket, unbolt the flange that connects the passenger's side up-pipe to the y-collector
(Figure 3).
a. These bolts are very easy to strip. Be Careful!
b. The back bolt closest to the firewall is difficult to reach unless you have a good
wobble adapter, or you removed the down-pipe and use long extensions.
c. Note: It is possible to skip this step and remove the up-pipe as a complete assembly if
you removed your down-pipe. It is a tight squeeze on some trucks. Also, pipes in poor condition can simply
fall out without even removing a bolt from the y-collector.
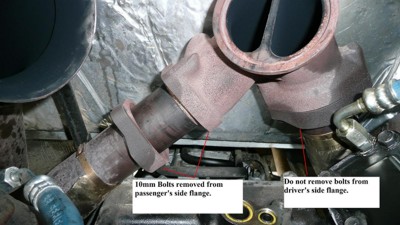
Figure 3 - Shows the bolts removed from the passenger's side flange. It is not necessary
to remove the bolts from the driver's side flange as this will easily slide out later.
3) Unbolt the lower flanges (both driver and passenger sides) that connect the up-pipes to the exhaust
manifolds (Figure 4).
a. For the bolts use a 10mm wrench to keep them from rotating, and the nuts use 13mm
sockets. Another option is to simply cut the bolts.
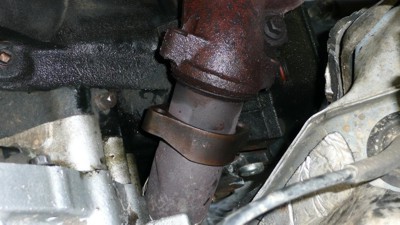
Figure 4 - Bolts removed from the flange connecting the up-pipe to the exhaust
manifold.
4) Once the lower flange bolts are out, remove the entire up-pipe assembly. The driver's side pipe will
slide out easily even with the y-collector still bolted in place (Figure 5).
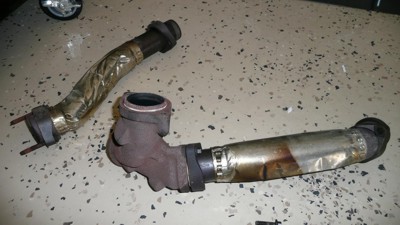
Figure 5 - The old up-pipe assembly removed.
5) Assemble the new driver's side up-pipe to the y-collector using one stainless steel gasket (Figure
6).
a. The stainless steel gasket can be assembled facing either direction.
b. Using a 10mm socket, tighten to 21 lb/ft.
c. Note: the bolts are dimpled on the threads making it harder to tighten them up. This is
normal and helps prevent these bolts from backing out. Using anti-seize compound can make disassembly
easier if necessary later on.
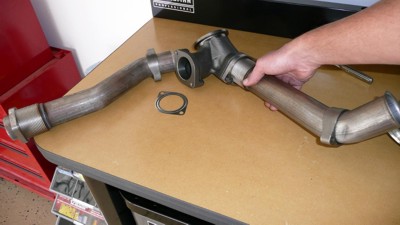
Figure 6 - Assemble and torque the driver's side pipe. Don't forget the stainless steel
gasket goes between the flange adapter and y-collector.
6) Install the up-pipes to the exhaust manifolds, DO NOT torque the manifold flange bolts just yet
(Figure 7).
a. Put the passenger's side on first, then the driver's side with the y-collector attached
(Figure 8).
b. You CAN go ahead and tighten the passenger's side up-pipe to the y-collector and tighten
to 21 lb/ft (Figure 8). Don't forget to use the stainless steel gasket here.
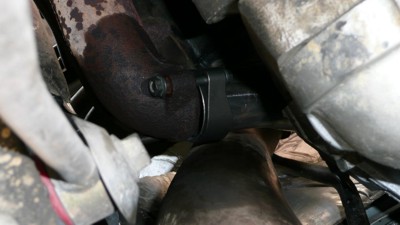
Figure 7 - Up-pipes loosely assembled to the exhaust manifold. Note the bolts have not
been tightened. You need to leave this loosely assembled for now to line up the y-collector to the turbo
later.
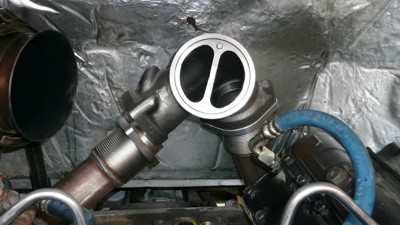
Figure 8 - The up-pipes in place. Passenger's side flange has not been attached yet. Go
ahead and assemble this now with the 10mm bolts and the stainless steel gasket.
7) Install the turbo pedestal and turbo using the new o-rings, then attach the y-collector to the back
of the turbo using the v-band clamp (Figure 9)
a. Turbo pedestal bolts are tightened to 18 lb/ft and the turbo mounting bolts are
tightened to 35 lb/ft (according to Garrett).
b. Apply even pressure when tightening bolts to prevent the o-rings from binding and
causing leaks.
c. Aligning the y-collector with the back of the pedestal takes some patience. This is why
the lower manifold flange bolts are not yet tightened to allow you room to wiggle everything in place. The
v-band clamp is tightened to 50 lb/in (that's inch, not feet) according to International.
d. Re-attach the down-pipe AFTER the up-pipe has been assembled and tightened to the
turbo.
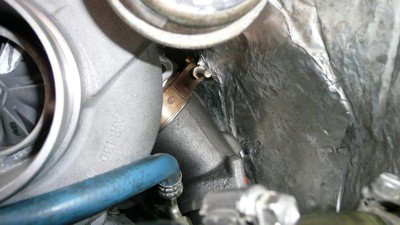
Figure 9 - The y-collector is secured to the exhaust inlet of the
turbo.
8) Go ahead and tighten the manifold flange bolts that connect the up-pipes to the exhaust manifolds.
Torque them down to 19 lb/ft.
a. Make sure the tubes line up with the exhaust manifolds as you tighten. Once you get past
a certain point, it will line up on its own and seat.
9) Reinstall the rest of the engine components you disassembled in step 1 (Figure 10).
a. Remember to check for any fuel or oil leaks before driving.
b. After a test drive, recheck for any fuel/oil leaks, and verify there are no exhaust
leaks.
c. Grab a beer, you are done!
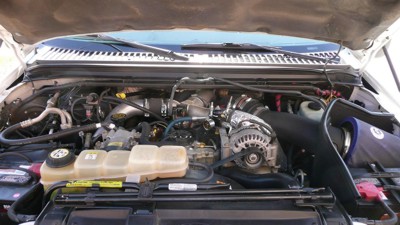
Figure 10 - The engine reassembled. Congratulations, you are
finished!
|
Final thoughts:
A lifted truck makes this job more difficult.I cannot stress enough the importance of using penetrating lube, and NOT stripping out the y-collector
flange bolts. If a bolt won't break loose, just stop, spray lube on it, walk away (or skip to another
step), then come back later and try again. If you do happen to strip the bolts and can't get it off (or if
you are just THAT impatient), then carefully cut the old up-pipes off.With many components on top of the engine disassembled, this is a great opportunity to install other
modifications.
|
|
|
Back to guzzle's Powerstroke Maintenance Index |

Click here to visit guzzle's Web Store. An affordable alternative to high priced Ford repair parts. We offer repair o-rings for fuel bowl leaks,
HPOP leaks, oil and fuel rail leaks, seals, repair kits, turbo re-install kits and other parts you can't even get from a Ford dealer.
|
|
